This information explains how to take pictures showing your child’s skin, range of motion, mouth, or all 3. It also explains how to send these pictures to your child’s care team using MSK MyChart.
Your child’s range of motion is how far they can move a part of their body. MSK MyChart is MSK’s patient portal.
When taking the pictures:
- Position your child so they’re standing in front of or lying on top of a solid-colored background.
- Turn your camera’s flash on.
- Center the body part you’re taking a picture of in the frame.
- Make sure the camera is focused. If you’re using your smartphone, tap the screen to focus it.
- If you’re using an iPhone, please turn off live photo. You will see when live photos are turned off.
Read Tips for Taking Pictures to Share with Your Healthcare Provider to learn more.
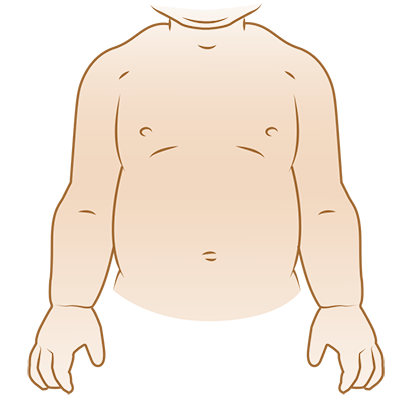
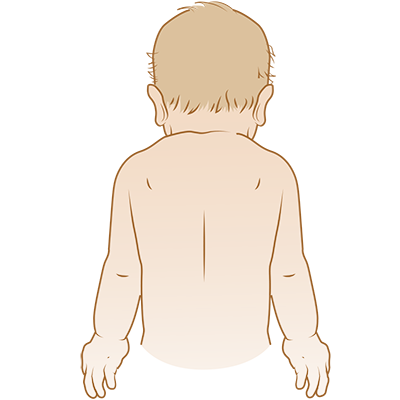
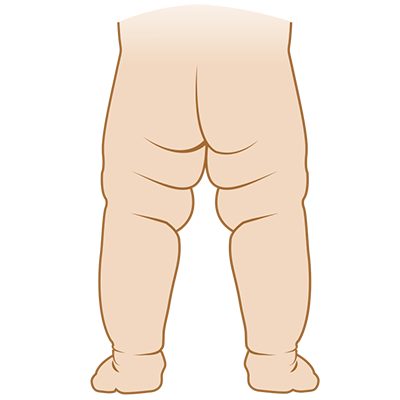
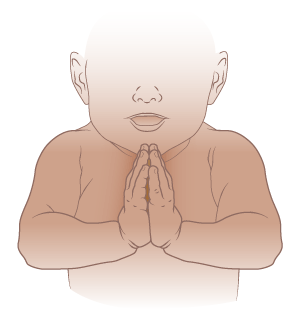
How to take pictures of your child’s skin
Face

Front of upper body
Back of upper body
Front of lower body

Back of lower body
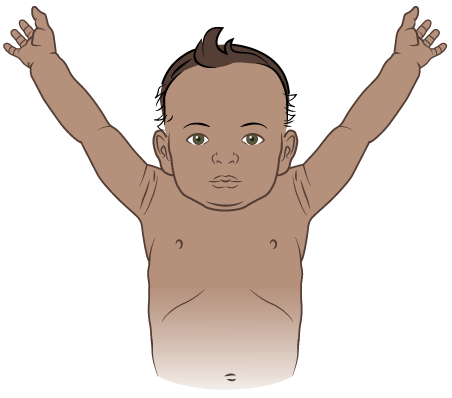
How to take pictures of your child’s range of motion
Your child’s care team will tell you if you need to take pictures of their range of motion.
It’s best if your child takes off any clothes covering the area you’re taking a picture of. This helps their care team more clearly see their range of motion and check their skin.
Shoulders
- Ask your child to raise their arms above their head with their palms facing forward. They should keep their elbows straight.
- Ask your child to move their arms as close to their ears as they can.
- Take a photo of this position.
Elbows
- Ask your child to hold their arms out to the sides with their palms facing upward.
- Ask your child to straighten their elbows as much as they can.
- Take a photo of this position. Include both arms in the photo, if you can.

Wrists and fingers
- Ask your child to place their palms together.
- Ask your child to raise their elbows until they are parallel to the ground. They should keep their palms as close together as they can.
- Take a photo of this position.
Ankle
- Ask your child to point their foot.
- Ask your child to flex their foot up toward their shin.
- Take a photo in this position.
- Repeat with their other foot.

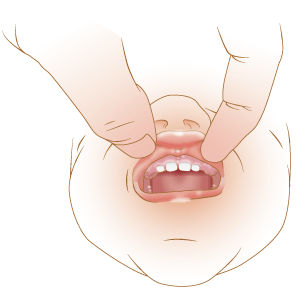
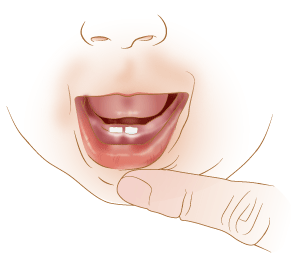
How to take pictures of the inside of your child’s mouth
Your child’s care team will tell you if you need to take pictures of the inside of your child’s mouth.
Left side of their mouth
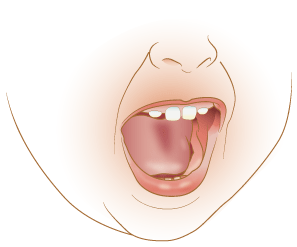
Back of their mouth
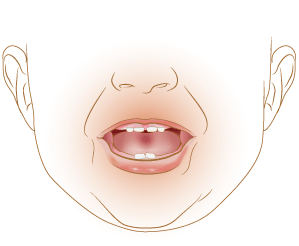
Right side of their mouth
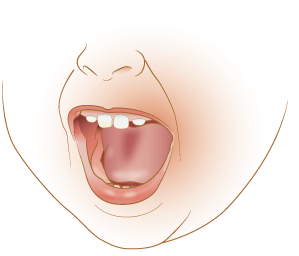
Upper lip
Lower lip
How to send pictures to your child’s healthcare provider using MSK MyChart
If you do not have a MSK MyChart account, visit mskmychart.mskcc.org, call 646-227-2593, or call your doctor’s office.
You may need to send more than one message to share them all with your child’s healthcare provider.
Using the MSK MyChart website
To send the pictures using MSK MyChart on your computer:
- Save your pictures to your computer. One way to do this is to use your phone to email the pictures to yourself, open the email on your computer, and save the pictures.
- Open your internet browser. Type in mskmychart.mskcc.org and log in to your MSK MyChart account.
-
Click “Messages” on home page.
- You can also click “Menu” at the top left.
- Scroll down to Communication and select “Messages.”
- Click “Send a message.”
- A new window will appear. Click “Ask a medical question.”
- Click “Brief medical question.” If your care team told you to use a different subject, choose that one instead.
- Choose the doctor and care team to send the message to.
- Click “Subject” and enter the reason for your message.
- Click “Enter you message…” and write a message to your care team.
-
Click “Attach.” Open the folder where your picture is saved and click on your picture. Then click the “Open” button. Repeat this step for each picture.
- MSK MyChart only lets you send a certain number of pictures at a time. You may need to send more than one message to share them all with your healthcare provider.
- When your message is ready, click the “Send” button.
Using the MSK MyChart app
To send pictures using the MSK MyChart app on your smartphone or tablet:
- Make sure your pictures are saved on your smartphone or tablet.
- Tap the MSK MyChart app icon. Log in to your MSK MyChart account.
-
Tap “Messages” on home screen.
- You can also select “Menu” at the top left. In the MSK MyChart mobile app, “Menu” appears as 3 lines at the top left.
- Scroll down to Communication and select “Messages.”
- Tap “Send a message.”
- Tap “Ask a medical question.”
- Tap “Brief medical question.” If your care team told you to use a different subject, choose that one instead
- Choose the doctor and care team to send the message to.
- Tap “Subject” and enter the reason for your message.
- Tap “Enter you message…”and write a message to your care team.
-
Tap “Attach” at the bottom of the screen. Choose “Photo.” Tap the photos to attach to your message. Tap “Done” in the upper right corner of your screen.
- MSK MyChart only lets you send a certain number of pictures at a time. You may need to send more than one message to share them all with your healthcare provider.
- When your message is ready, tap “Send” in the lower right corner of your screen.
The messages you send using MSK MyChart are encrypted. That means no one but your MSK care team can see them.
Learn about our Health Information Policy.