Time to Read:
About 1 minute
This information will explain how to set up and take a temperature reading using the Withings Thermo thermometer.
How to set up the Withings Thermo thermometer
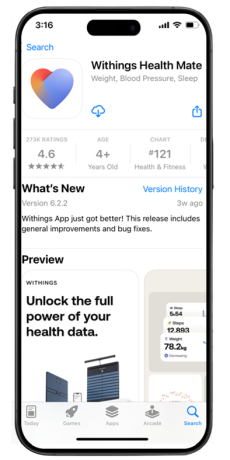
- Download the Withings Health Mate app from iOS or Google Play Store (see Figure 1).
- Select “Get Started” (see Figure 2).

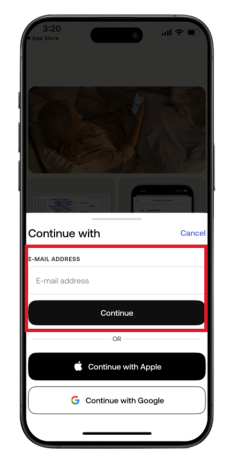
- Enter the email address you would like to login with and click “Continue” (see Figure 3).
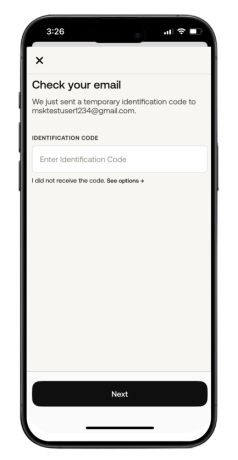
- Check your email address for a Withings verification code. Enter the code into the Withings Health Mate App and click “Continue” (see Figure 4).
- From top right-hand corner of the Home screen, tap the “Devices” icon (see Figure 5).
- Tap the “Install a device” (see Figure 6).

- Select “Thermo” from the list (see Figure 7).

- Select “Install” (see Figure 8).

- Press and hold the button on your Thermo device until the display shows SETUP. Tap “Next” to continue (see Figure 9).

- Once the Thermo is detected tap “Next” (see Figure 10).

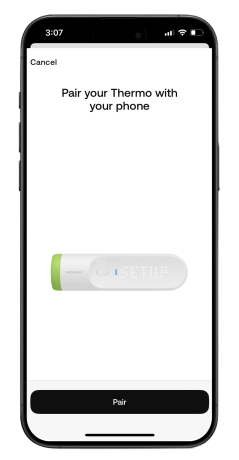
- Tap “Pair” to start the pairing process (see Figure 11).
- Tap “Pair” when the Bluetooth Pairing Request appears (see Figure 12).

- Your Thermo has connected. Tap “Next” (see Figure 13).

- Tap “I don’t have Wi-Fi”. The phone will be set up to connect to Bluetooth (see Figure 14).

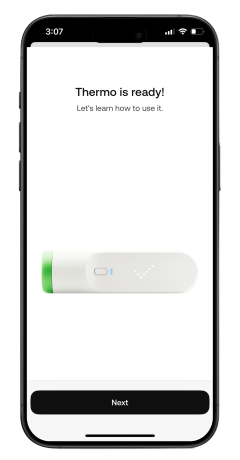
- The Thermo setup is complete. Tap “Next” (see Figure 15).
How to take a reading with the Thermo device
- Review the on-screen instructions to take your first reading. First, take the cap off the Thermo device. Tap “Next” (see Figure 16).

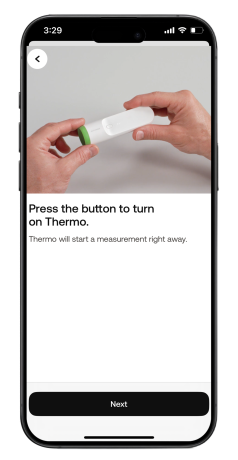
- Press the button to turn the Thermo on. Tap “Next” (see Figure 17).
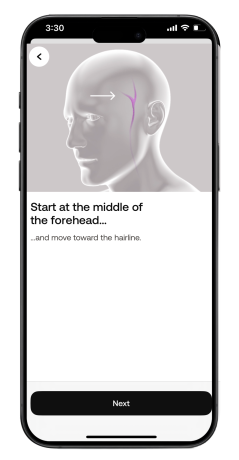
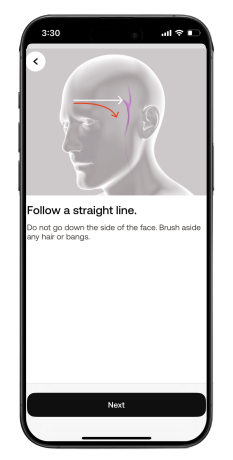
- Place the Thermo over the middle of your forehead. Scan towards your hairline in a straight line. The device does not need to touch your skin (see Figures 18-21). Tap “Next” after each screen.


- Once the temperature is taken, slide your finger on the Thermo until you see your name. Tap “Next” (see Figure 22).

- Press the button to assign the reading to yourself (see Figure 23).

- Review your results and tap “Next” (see Figure 24).

- You can review your temperature measurements in the Withings app. The reading may take a couple minutes to appear. You will be given some tips about using the Thermo. Once you review, tap “Done” to return to the homepage (see Figure 25).

- The reading will automatically be sent to your doctor at MSK (see Figures 26).

Last Updated
January 31, 2025
Learn about our Health Information Policy.