Time to Read:
About 1 minute
This information explains how to take a blood pressure reading in the MSK Remote monitoring app using your OMRON 5 Series BP5250 blood pressure monitor.
How to set up your OMRON 5 Series BP5250
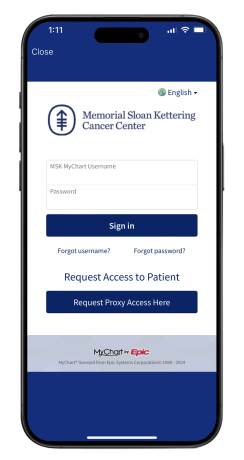
- Open the MSK Remote Monitoring app on your smartphone or tablet and log in using your MSK MyChart credentials (see Figure 1).
- Review the authorization screen and select “Continue” (see Figure 2).

- Review the data authorization screen and select a time range, then tap “Allow access” (see Figure 3).

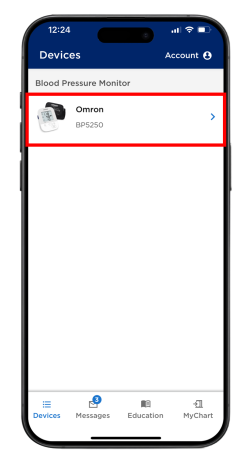
- You will see the Devices screen. Look for the Blood Pressure Monitor tile. Select “Omron BP5250” (see Figure 4).
- Tap “Take a reading” (see Figure 5).

- The Omron BP5250 requires a one-time pairing to your mobile device at the first set up. Press “Start Pairing” (see Figure 6).

- Select “Allow” when the Bluetooth permission screen appears. The app needs permission to search for Bluetooth devices to connect (see Figure 7).

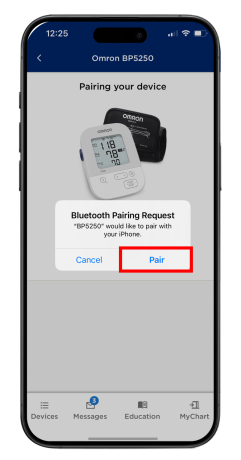
- Press and hold the Bluetooth symbol button on the Omron BP5250 device until pairing begins. Select “Pair” when the Bluetooth Pairing Request appears in the MSK Remote Monitoring app (see Figure 8).
- You will see a message that the Omron device has successfully paired on your smartphone (see Figure 9). You can now take your first reading.
How to take you blood pressure using the OMRON 5 Series BP5250
- Once the device is successfully paired place the OMRON BP5250 blood pressure cuff on your arm.
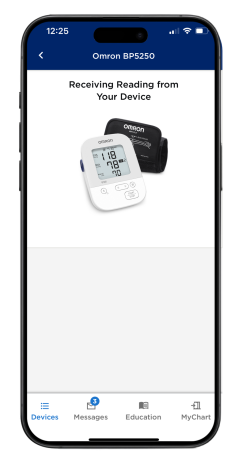
- Press the start button on your blood pressure machine. Follow the instructions on your smartphone or tablet (see Figure 10).
- Once the reading appears in the MSK Remote Monitoring app, tap “Submit” (see Figure 11).

- The screen will update to show your latest reading (see Figure 12).

- You can also review all your readings in the “History” tab (see Figure 13). You can also view your readings as a graph in the “Chart” tab (see Figure 14).


Last Updated
January 31, 2025
Learn about our Health Information Policy.